Fakuma, one of the most famous German exhibitions on international trade for plastics processing will be held in Friedrichshafen, on Oct. 17th till 21st, 2023. Being very impressive for both exhibitors and visitors the high-tech companies from all over the world count down for its opening. The one traditional exhibitor for this exhibition, is SIKORA, and at this article you read this year’s new approach of this company by their words.
***********************************************
At Fakuma SIKORA presents trendsetting solutions for quality control in the hose, tube and pipe as well as plastics industry. The trade show appearance is in line with the motto “Ideas, Passion, Future”, which SIKORA has developed for its 50th anniversary. Visitors can get convinced by the innovative products and inform themselves about future developments in discussions with the SIKORA experts.
Inspection and sorting of plastic material

 How to reliably sort plastic material is demonstrated by the modularly developed PURITY SCANNER ADVANCED. In addition to optical 25 µm high-resolution cameras, which detect black specks and discolorations, an X-ray camera ensures the detection of metallic contamination. Depending on the material and requirements, the customer decides how many and which camera types are used. Common systems on the market have a maximum of two optical cameras. By using a third camera in the SIKORA system, a significantly higher detection rate is achieved, so that more contamination are detected. The interaction of reliable detection and intelligent sorting ensures highest material quality. At the same time, production processes are optimized, which contributes to a cost-efficient and sustainable production.
Live material tests
At the SIKORA booth, visitors can automatically inspect and analyze small quantities of crystalline and amorphous pellets, flakes or test plates for contamination with the inspection and analysis system PURITY CONCEPT V. The system is suitable for reproducible laboratory applications and detects black and colored contamination from a size of 50 µm as well as discolorations. Analysis takes less than a minute, including test certificate and HSV color chart of the detected color deviations. The system thus contributes to increased product and quality reliability. Visitors can see the system’s performance live at the booth and are invited to bring samples to be tested free of charge.

Measurement of tubes and pipes by means of millimeter wave technology

In the area of extrusion, SIKORA presents the CENTERWAVE 6000/250 for the measurement of tubes in the diameter range from 32 to 250 mm during production based on millimeter wave technology. All dimensions of the tube, such as the diameter and the wall thickness, are determined and visualized in real time over 360 degrees of the pipe circumference. The measurement data obtained enables automatic control of the minimum wall thickness, taking into account the standard deviation of the extrusion line. This allows potential savings to be exploited to the maximum. In the line, the system enables gapless, reliable quality control as well as automatic control. The model is characterized by its simple operation. At the push of a button, the operator immediately receives continuous and precise measured values, without presetting the product parameters, without the influence of a coupling medium and without any calibration. The exhibited CENTERWAVE is only one model out of a comprehensive product family offered by SIKORA for the measurement of different product diameters from 32 to 3,200 mm.
Measurement of tubes and hoses by means of X-ray technology for single-layer and multi-layer applications.

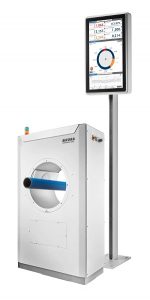
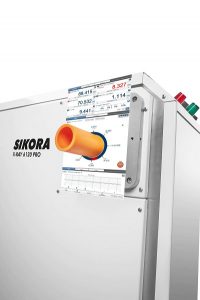
For more than 30 years SIKORA has been offering X-ray technologies for quality control and enables manufacturers a reliable inline quality control of stranded products. How to reliably measure different layers of tubes and hoses during the extrusion process is demonstrated at the SIKORA booth by the X-ray measuring system X-RAY 6000 PRO in combination with the processor system ECOCONTROL 6000. At the 22″ monitor the measuring values are displayed numerically as well as graphically as trend and statistical data. By default, the wall thickness is displayed at eight measuring points. In addition, an intelligent physical evaluation model determines the minimum wall thickness, i.e., the available value, which optimally supports the user in controlling the process. The physical model also allows the wall thickness to be visualized over the entire circumference of the tube or hose at any point. The user selects how many points and at which position the values are to be displayed. The processor system is also used for automatic control of the line speed and extruder rpm. It thus guarantees the compliance with the given specifications as well as highest performance for a maximum of process optimization and productivity. The X-RAY 6000 PRO can be used for product diameters from 0.65 to 270 mm.
For products where a single layer measurement is required, SIKORA presents the X-RAY 6000 PURE to the Fakuma visitors. Also using X-ray technology, the device measures single-layer products as well as the total wall thickness of multi-layer products and covers with two models product diameters from 6 to 110 mm. The measured values are visualized on a 15″ display; if required, automatic control to minimum wall thickness is also possible. Ensuring quality while saving material leads to a significant increase in productivity and also contributes to save CO2 and thus to protect the environment.


